Demontage / Disassemble

Bebilderte Anleitung zur Demontage der Squeezebox Boom / Illustrated manual to disassemble Squeezebox Boom

Logitech’s Squeezebox System (formerly developed by Slim Devices) was one of the best multi room systems available at the time – and some time after. A special highlight was Squeezebox „Boom“ with integrated amplifier and speakers and a powerful bass that was astonishing considering the device’s size.

On this page you can find a short manual on how to disassemble the device, e.g. to replace the speakers.

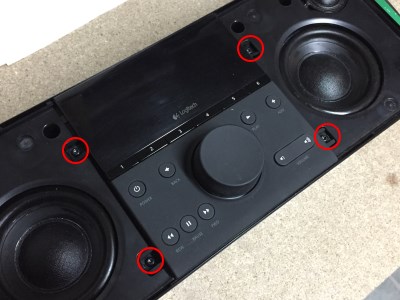
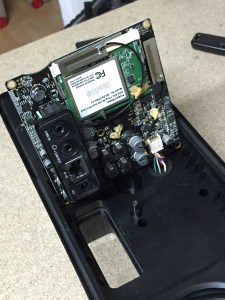
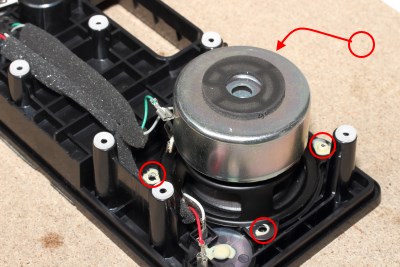
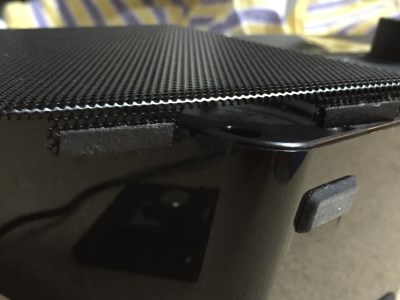
Zunächst müssen die Lautsprechergitter entfernt werden. Diese sind nur stabil festgeklemmt. Man kann beispielsweise mit einer alten Kreditkarte oder mit einem Nagel das Gitter vorsichtig heraushebeln, ohne das Gehäuse oder das Gitter selbst zu zerkratzen oder zu beschädigen.

First the speaker grills have to be removed. These are just clamped in tightly. You can use an old credit card or a nail to carefully pry them out without scratching or damaging the case or the grill itself.

Das Bedienteil ist mit vier Schrauben fixiert. Wie alle Schrauben an der „Boom“ können diese mit einem Torx-10-Schraubendreher gelöst werden.

The control panel is being held in place by four screws. As with all the „Boom“'s screws these can be loosened with a Torx 10 screwdriver.

Bei der Squeezebox Boom kommen nur zwei verschiedene Schraubengrößen zum Einsatz. Die langen Schrauben gibt es ausschließlich bei der Gehäuseverschraubung zwischen Lautsprecherträger und Korpus. Überall sonst werden kurze Schrauben verwendet.

For the Squeezebox Boom, only two different screw sizes are being used. The long screws are used exclusively to mount the woofer array to the case. In every other position, short screws are being used.

Das Bedienteil vorsichtig nach vorne klappen und das Flachkabel von der Hauptplatine oder dem Bedienteil lösen. Das Kabel ist nur gesteckt und kann einfach herausgezogen werden.

The control panel can now carefully be lowered to the front and the ribbon cable can be disconnected from the mainboard or the panel. The cable is just plugged in and can easily be pulled out.

Die Hauptplatine ist mit fünf weiteren Torx-10-Schrauben befestigt. Bei den oberen Schrauben gibt es zusätzliche Haltebleche, die ebenfalls entfernt werden.

The mainboard is mounted with another five Torx 10 screws. Both top screws also hold brackets in place which have to be removed as well.

Ein weiteres Flachkabel verbindet die Hauptplatine mit dem Sleep-Taster an der Oberseite. Auch dieses ist nur gesteckt.

Another ribbon cable connects the mainboard with the sleep button on top. This is also simply plugged in.

Die Hauptplatine kann nun zur Seite geklappt werden. Durch das Anschlussfeld an der Rückseite und die Lautsprecherkabel sitzt es relativ fest und muss ggf. sanft freigerüttelt werden.

The mainboard can now be flipped to the side. Due to the connection panel at the back and the speaker cables it is rather tight and may need to be pried loose carefully.

Die Lautsprecher sind über einen Pfostenstecker angeschlossen. Nachdem dieser gelöst wurde, kann die Hauptplatine entfernt werden.

The woofers are connected with a block connector. After unplugging this, the mainboard can be removed.

Auch die Front kann nun abgeschraubt werden. 6 Schrauben befinden sich neben den Lautsprechern, 2 Schrauben hinter der Hauptplatine.

Die Gehäuseform sieht danach aus, dass es bei einigen Modellen auch 4 Schrauben hinter der Hauptplatine sein könnten. Bei meinen „Booms“ waren es nur zwei – die freien Bohrungen habe ich im Bild grün markiert.

Now the front can be unscrewed as well. 6 screws are located next to the speakers, 2 screws behind the mainboard.

The body looks as if some models actually have 4 screws behind the mainboard. With my „Booms“, there were only two – I circled the free holes green in the picture.

Das Gehäuse ist überall gut gedämmt und abgedichtet. Bei der Demontage kann daher die Front etwas am Korpus kleben und muss wieder freigerüttelt werden.

Beim Zusammenbau muss natürlich darauf geachtet werden, dass die Dichtung überall sauber in der passenden Nut liegt.

The case is well insulated. When disassembling, the front may stick to the back and has to be pried loose as well.

When reassembling you have to take care that the seal is placed correctly in its groove.

Ein Wort zum Zusammenbau: Wenn ein Bauteil mit mehreren Schrauben befestigt wird, dreht man zunächst alle Schrauben lose ein, um das Bauteil in die richtige Position zu bringen. Danach werden die Schrauben fest eingedreht – zunächst diagonal gegenüberliegend, dann der Rest. Zum Schluss noch einmal alles nachziehen.

A word on assembly: If a part is to be mounted with several screws, you place it with all screws, but do not tighten them yet. Only when you are sure that the part’s position is correct you start tightening the screws, starting with diagonally opposing sides. Finally you check if every screw has been tightened correctly.

Schließlich können die Lautsprecher entfernt werden. Die Tief-/Mitteltöner sind mit je vier Schrauben befestigt, die Hochtöner mit je einer. Den Kleber, mit dem die Schrauben fixiert sind, kann man leicht abkratzen.

Beim Zusammenbau ist darauf zu achten, dass die Lautsprecher relativ fest eingeschraubt werden, sonst vibrieren sie hörbar im Gehäuse. Danach können sie z. B. mit Heißkleber einfach wieder fixiert werden.

Finally the woofers can be removed. The bass woofers are mounted with vier screws each, the treble speakers with one. The glue that fixes the screws can be easily scratched off.

When reassembling, the woofers have to be screwed tightly, otherwise there will be audible noise within the case. Afterwards they can be re-fixed with hot glue for example.


Navigation